
If you’re an influencer or brand on Facebook, you might know what it’s like to be targeted by scammers who create fake accounts and pretend to be you. When it happens, you need a way to show your audience that your profile/page is the authentic one.
Enter Facebook’s verification badge.
Getting your Facebook account verified is a great way to prove your authenticity and credibility to your online audience. The verification badge can also help your Facebook Page rank higher in search results on the platform. This makes it easier for potential customers to find your business.
However, applying to be verified on Facebook is a mysterious process. There’s no way to know for sure that your application will be accepted. But don’t get discouraged!

In this article, we’ll discuss the steps you can take before applying to get verified on Facebook that will increase your chances of being verified. We’ll also cover things you can do to ensure that you keep your verification badge on Facebook once you get it.
Let’s dive in!
What is Facebook verification?
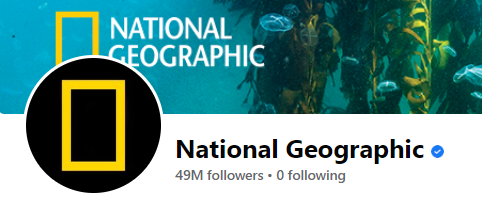
Facebook verification refers to the process of getting an account or Page verified. When Facebook verifies an account, it adds a blue checkmark beside the account name to show other users that the account is authentic.
In 2013, Facebook took a cue from Twitter and started verifying genuine accounts belonging to celebrities, artists, and notable organizations. In 2018, Facebook started verifying Pages with large followings. And now, they’re offering the checkmark to individual profiles when the audience reaches a particular size.
What Facebook verification isn’t
If there’s one feature Facebook offers, it’s badges. The platform offers top seller badges, top fan badges, the verification badge, and so on.
The verification badge, in particular, is a blue checkmark, and is distinct from other available badges.
In the past, Facebook offered gray checkmarks and Marketplace verifications. But they’ve scrapped these programs.
How to get verified on Facebook
Getting that coveted blue checkmark on your Facebook profile is as easy as filling out a single page verification request form. But if you want the best chance at getting your application accepted, there are some things you need to do first.
Step 1: Choose the kind of account you want verified
You can request verification for a Facebook profile or Page.
Before filling out the verification form, you need to log into your Facebook account. When you’re logged in, the form will automatically show you the profiles or pages you can request verification for.
If you’re applying for a Facebook profile, you only need the profile’s URL to get started.
Step 2: Confirm your authenticity
When you apply for a Facebook verification, you’ll be asked to provide a document that proves that you are, indeed, who you say you are. This step ensures that Facebook does not verify fake accounts and impersonators.
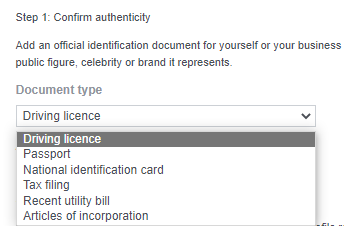
Facebook accepts these forms of verification:
- National identification card
- Passport
- Driver’s license
- Recent utility bill
- Tax filing
- Articles of incorporation
The specific forms of identification that are accepted vary based on who issued them. If you’re not sure if Facebook will accept your ID, check out their list of rules regarding ID. Whatever ID you use, you’ll need to scan it so that you can attach it to the verification form.
Step 3: Confirm your notability
On the verification form, Facebook asks you to prove that your account is notable enough to be verified. In essence, they want to know that your account is prominent enough to be at risk of impersonation.
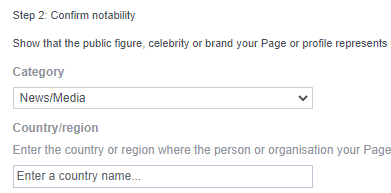
In this section, you’ll provide basic information about your account, including the category it falls under, and the region/country your account is most popular in.
You’ll also find several optional fields. The more information you provide, the higher your chances are of getting verified.
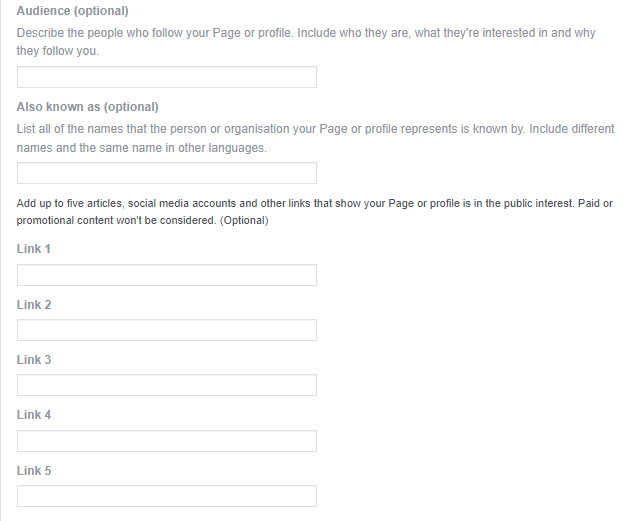
The Audience section is where you provide information on the kinds of people that follow you, what their interests are, and why they’re following your account. You don’t necessarily have to fill in the Also known as field, unless your business/brand goes by different names in different markets.
The last thing you’ll have to do is provide up to five links to other social media accounts or articles that best demonstrate how popular your account is. These links should be independent—Facebook won’t consider paid or promotional content.
Step 4: Wait for an email
Once you submit your application, Facebook will review your request and decide whether to approve or reject it. This process typically takes between 48 hours and 45 days. Whatever the outcome, Facebook will send you an email about your application.
Six ways to improve your chances of getting verified on Facebook
When deciding whether or not to verify a profile or Page, Facebook looks for four factors:
- Authenticity: Is the profile or Page actually run by the person (or team of the person) it represents?
- Completeness: Does the profile or Page provide all the necessary information about the individual, brand, or organization it represents?
- Uniqueness: Is the profile or Page the only existing representation of that individual, brand or organization on Facebook?
- Notability: Is the individual, brand, or organization popular enough that granting them a verification badge is in the public interest?
In this section, we’ll discuss a few ways to ensure that your Facebook profile or Page meets all the requirements for a verification badge.
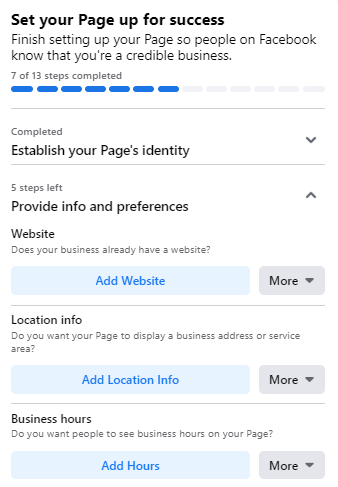
1. Update your company information
No matter how professional your Facebook business page looks, you’ll likely not be verified if your information isn’t up to date. Facebook typically reviews and validates applicants’ information before they grant the verification badge. So you need to ensure that yours is accurate.
To do this, pay attention to your:
- Website URL
- Email address
- Bio
- Description
2. Provide details
The more details you provide about your brand, the better your chances are of getting verified. A great place to start is your Page’s About section. Fill in details like:
- Address(es)
- Phone number(s)
- Your other social media handles
- Your mission statement
- A company overview
3. Be professional
The aesthetic and overall vibe of your Facebook page should match the image your brand presents in the physical world and digital landscape. This helps Facebook understand the connection between your Page and your brand.
This means that you should only share on-brand content on your Facebook Page. Avoid sharing content that will reduce your credibility in the eyes of the public, such as:
- Low-quality and/or off-brand visuals
- Posts containing grammatical and spelling errors
- Unprofessional posts, and anything that doesn’t align with your brand voice
To determine content that can prevent you from getting verified, analyze your business page through the lens of a potential customer, and tweak or remove anything that doesn’t look professional.
4. Include links to your official web properties
If you want to get verified on Facebook, you need to include an accurate link to your business’ official website. You should also include a link to your Facebook Page on your website.
5. Create a Facebook Business Page
If you’re a brand looking to get verified on Facebook, it makes sense to set up a Facebook Business Page. Creating a business Page is completely free, and the process for verifying a Page is the same as verifying a profile.
The information you include on your business Page will show that you’re authentic and notable.
6. Build a community
A huge part of getting a blue checkmark is your notoriety. And the best way to show that you’re popular is to build a large and active following on Facebook.
There are several ways to build a community and increase your engagement rate on Facebook. Some of these methods include:
- Posting user-generated content
- Running ads
- Organizing a giveaway
- Using Facebook analytics tools to know the kinds of content your audience engages with
How to stay verified on Facebook
Getting a blue checkmark is one thing—keeping it is another. Per Facebook’s rules and regulations, your verification badge can be taken away from you on certain occasions. Here are some things you should do to stay verified on Facebook:
1. Enable two-factor authentication
Having a blue checkmark next to your account name can be insanely valuable to your brand. So the last thing you want is for some hacker or scammer to hijack your verified account.
To prevent this from happening, enable two-factor authentication—a security system that adds an extra layer of protection to your account. This layer gives you an alternative way apart from the typical log-in screen to prove your identity when you access your account. This alternative can be:
- A third-party authentication app
- An SMS sent to your phone number
- A physical security key
This makes it much harder for someone that’s not you to log into your verified Facebook account.
2. Respect Facebook’s Community Standards
When your account is verified, you need to make sure you’re familiar with Facebook’s Community Standards.
While you might think that you’ll have to follow the same rules as every other Facebook user, that’s not quite the case.
Sure, you’ll have to comply with Facebook’s standards on illegal content and online harassment, same as everyone else. But there are other rules that specifically apply to verified accounts.
For example, if you’re reposting content by other users—which is a great way to increase your engagement and build a community—ensure that you do so in a way that aligns with Facebook’s intellectual property and privacy standards.
3. Create and implement a Facebook marketing strategy
As mentioned earlier, popularity plays a major role in account verification. So you have to remain popular to keep your verification badge.
To do so, implement some top-tier Facebook marketing practices that can help you find and interact with your audience.
Facebook marketing includes everything from posting organically to running ads.
As a rule of thumb, you should pursue anything that puts your brand in a good light and increases your credibility. Facebook’s verification badge is one of those things. If you follow the steps outlined above before filling out the verification form, you’ll have a shot at having your own checkmark.
Manage your Facebook presence, as well as your other social media profiles with Hootsuite. From a single, easy-to-use dashboard, you can create and schedule posts, engage with your audience, and measure the results of all your marketing efforts. Try Hootsuite for free today.