
While it’s no secret that video has been dominating marketing for several years, there’s no doubt that 2016 and 2017 have been the years of live video.
It feels like every other day I’m getting a notification that someone I know is going live on some platform, and we’re getting frequent updates to both Instagram’s and Facebook’s live video features.
It’s clear that live video has made a huge impact on social media marketing and it’s here to stay.

All businesses can—and should—be leveraging the benefits of live videos, and preferably on multiple platforms.
Since it can be a little difficult to keep up with, this ultimate guide to live video is going to go over everything you need to know, including its benefits, detailed features on each platform that offers it, challenges, and best practices and use cases.
Ready to get started? Let’s go.
The Benefits of Live Video
There’s something special about live video that audiences inherently respond to. For one, it feels more urgent, because it’s happening right now; some platforms will even notify users when someone they follow is going live. Since many platforms will label broadcasts as live and prioritize them in the moment, these videos also stand out and can attract more user attention.

Live video is also immensely interactive, which is a good word to use when it comes to anything related to social media. Viewers can react to your video in real time, and ask you questions or comment as the broadcast is happening.

This gives you the chance to address viewer comments as the video proceeds, creating a more intimate and authentic experience. This builds trust and rapport, which is the most valuable currency in marketing today.
Which Platforms Currently Have Live Video?
A number of platforms currently have live video, and I’m expecting that we’ll see an increase in platforms focusing on live broadcasting as time goes on. The platforms that currently offer live broadcasting include:
- Facebook’s live video, which appears in the newsfeed
- Instagram live stories, which are part of the stories feature
- Periscope, which is a separate app but still connected as a sister company to Twitter
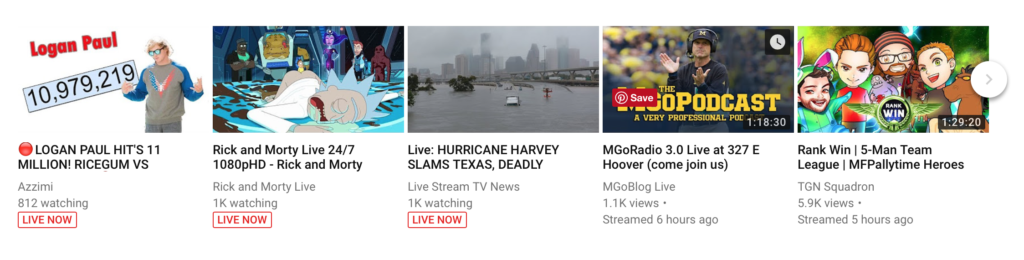
- YouTube live, which is a relatively new feature; live broadcasts can be viewed on your live channel and YouTube’s live channel here
Each platform has its own unique features and considerations to keep in mind. Let’s take a closer look at each and how to use them.
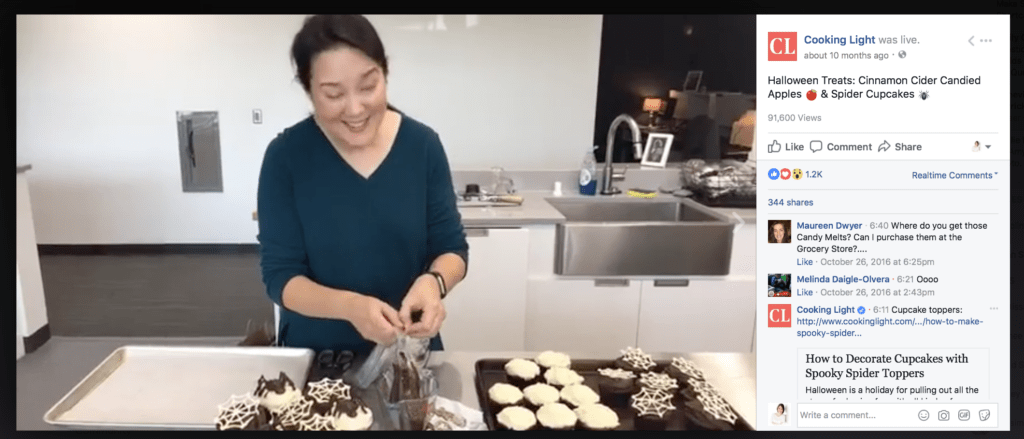
What Is Facebook Live Video?
If you only intend to learn live video on one social media site, I would choose Facebook, hands down. Their live video platform easily has the most features and is being rapidly developed. Both live video and live audio broadcasting are available.
Most Facebook Pages can go live from either desktop or mobile devices, though it’s definitely easiest to do through a mobile device, which gives you the option of both forward facing and self-facing cameras.
With Facebook live, you can now even invite someone to join your broadcast. This will result in a split-screen video, where you can talk to or interview the guest in real time. You can invite and remove guests at any time.
Facebook Live Features
Facebook live has incredible features, some of which are brand new. These include:
- The ability to use both forward facing and self-facing cameras, even switching between them during a broadcast
- Notifying your followers when you go live
- Ability to save and immediately share the live broadcast after it’s ended on your Timeline, which then becomes a permanent video
- Allows users to interact in real-time with both comments and reactions
- Both Page admins and designated “live contributors” can go live on a Page
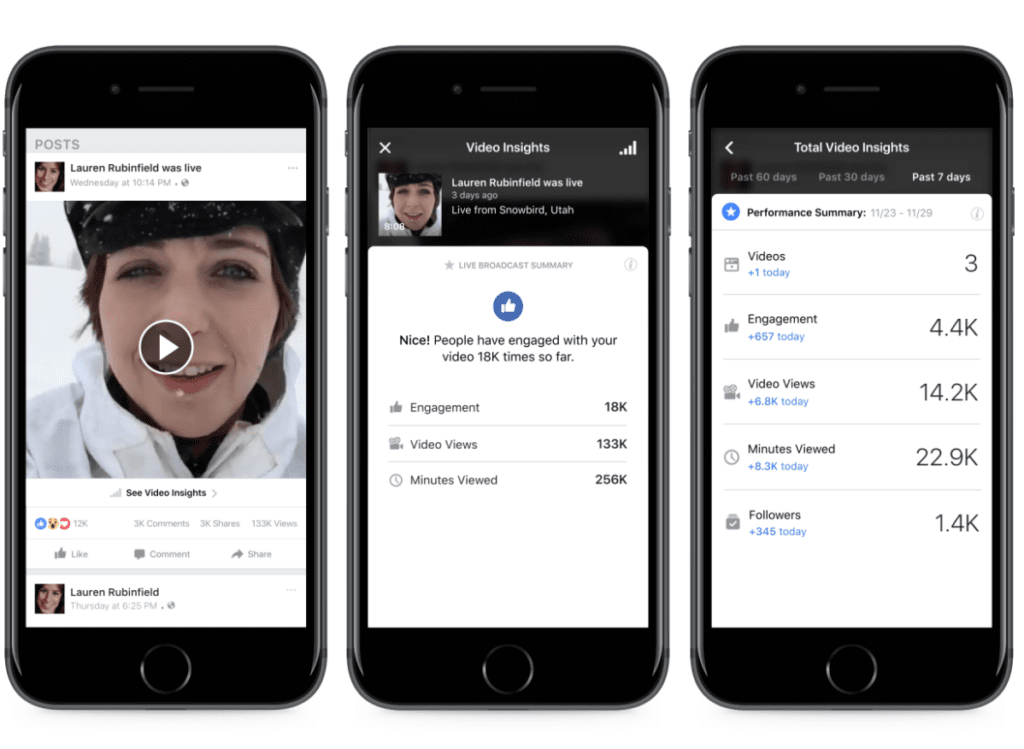
- “Lightweight” video metrics, showing views and engagement metrics
- Ability to pin comments to the bottom of a video, bringing it to the attention of other viewers
- Split-screen videos allowing you to invite contributors to join you live

- Ability to schedule a live broadcast before it happens to help promote it


How to Broadcast Live on Facebook
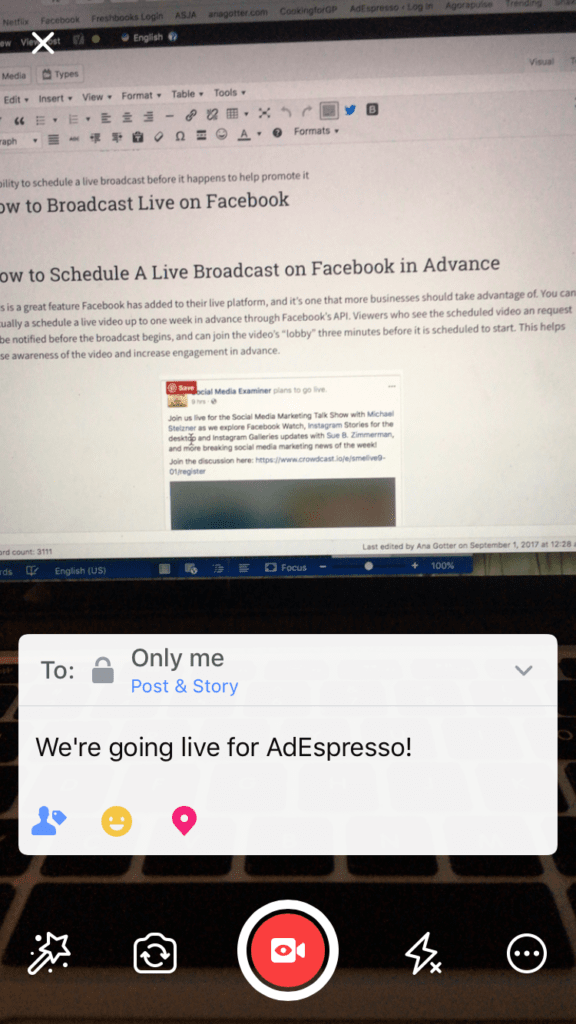
You can broadcast live video on Facebook from both desktop or mobile, but I think it’s a little easier and more convenient (in most cases) to use mobile, so that’s what our tutorial will use.
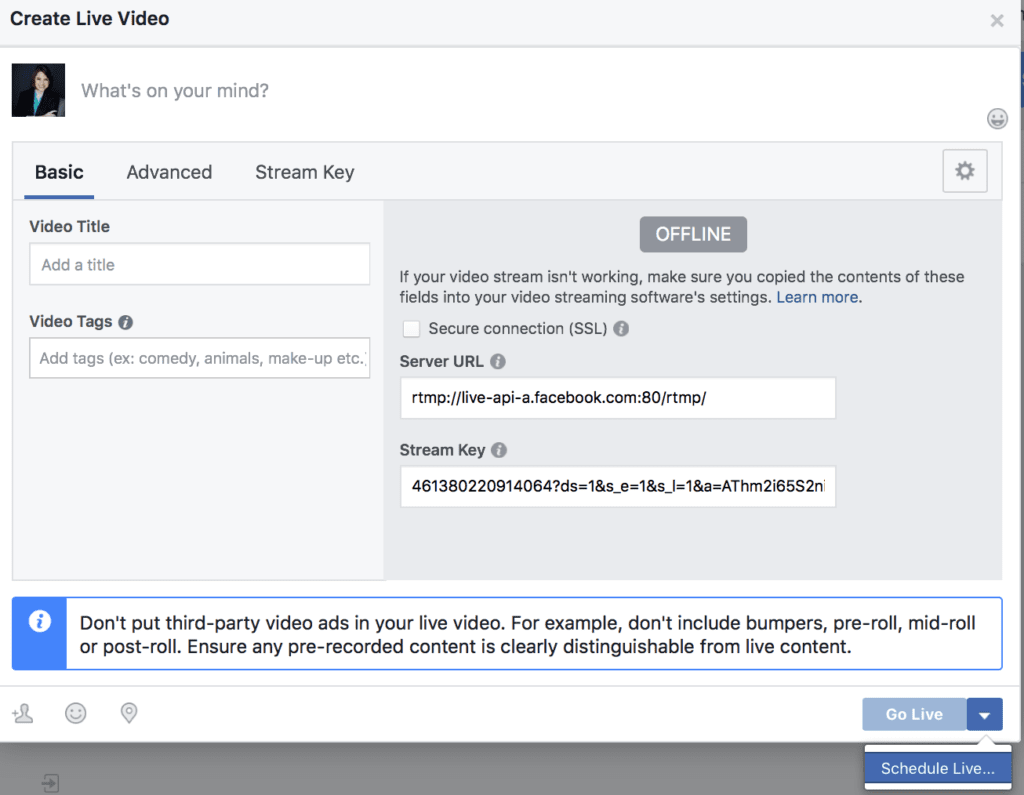
When you go to post a status- either as a user or through your Page- you’ll see the “Go Live” option.
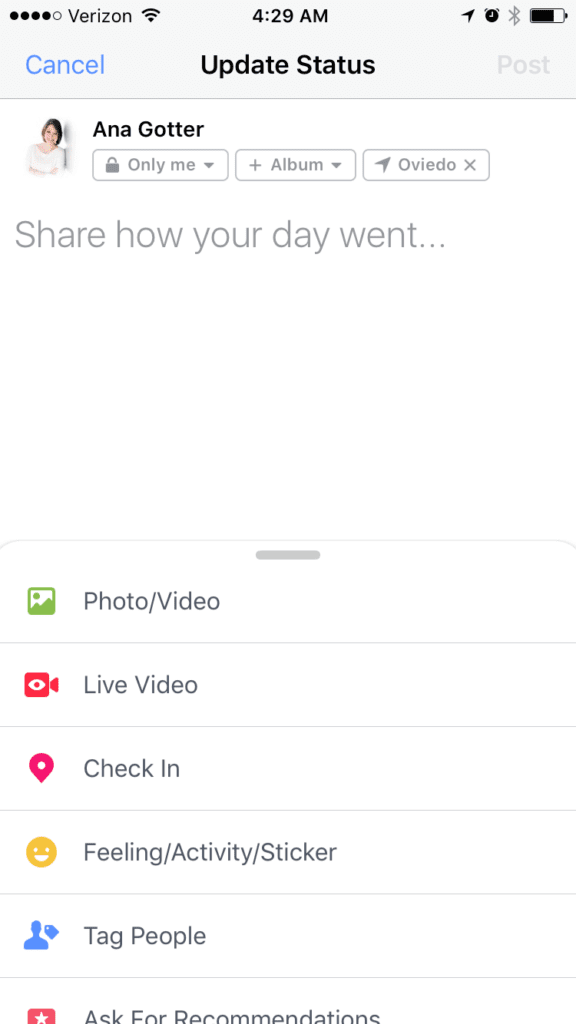

On the next screen, you’ll be able to set your audience (for personal profiles) and decide whether you want it to be shared as a post or a story. I highly recommend choosing post, which allows the video to be added to your library, or the video will be unavailable after the story ends.


On the next screen, you’ll see the option to enter in text to describe your video. This may determine if people click in to watch, so make sure it’s good.

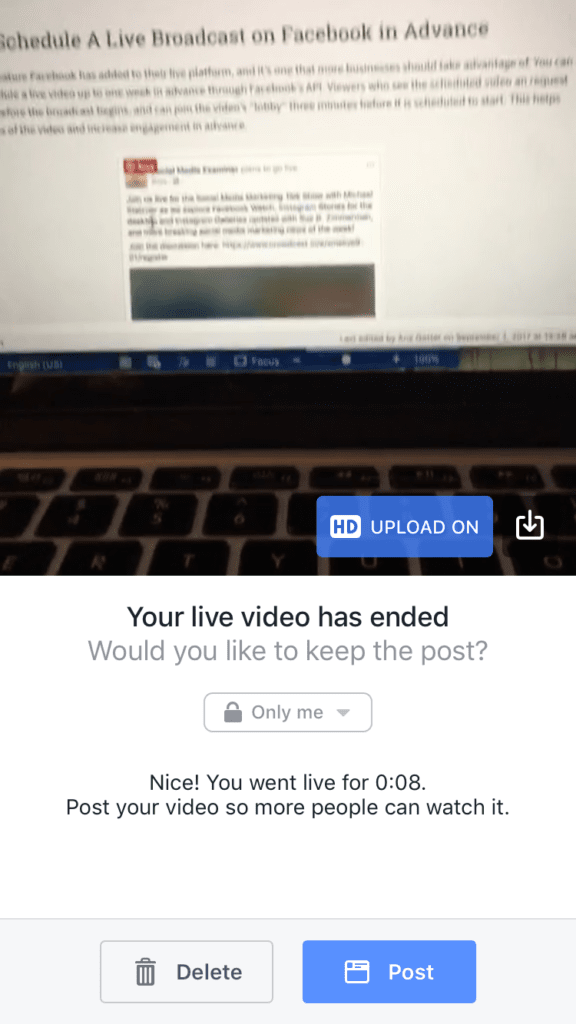
Once the video broadcast is over, you’ll see the options to save it to your camera roll (top corner) and share it as a post.

How to Schedule A Live Broadcast on Facebook
This is a great feature Facebook has added to their live platform, and it’s one that more businesses should take advantage of.
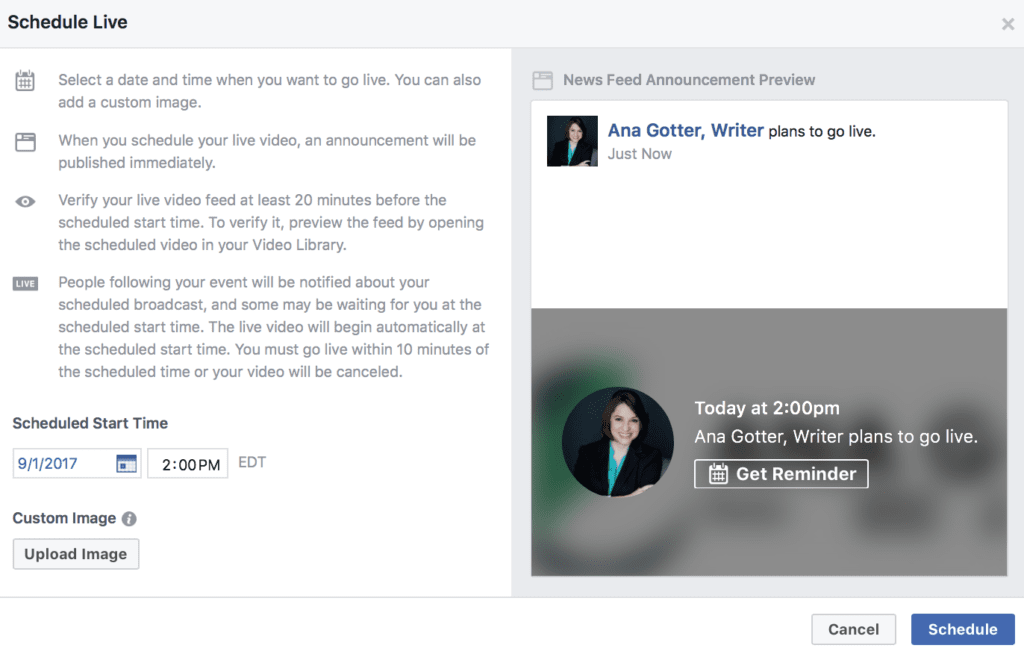
You can actually a schedule a live video up to one week in advance through Facebook’s API. Viewers who see the scheduled video can request to be notified before the broadcast begins, and can join the video’s “lobby” three minutes before it is scheduled to start. This helps raise awareness of the video and increase engagement in advance.

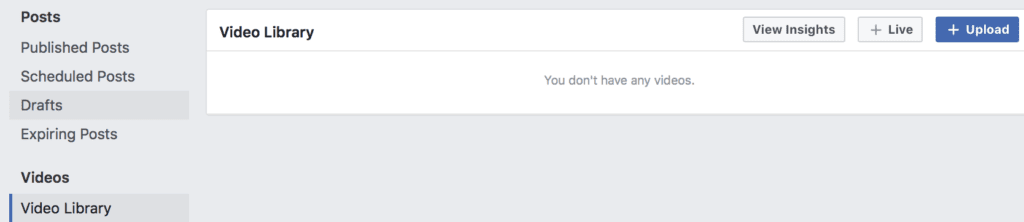
To do this, navigate to your Page, and then select the videos tab. Click to the video library, and then select the “+Live” in the top right corner.


When scheduling a live video, you should schedule the time and data. You can upload a custom image if you’d like, but the default will be your Page’s profile picture, the date and time, and a CTA for users to get a reminder. Click “Schedule, ” and you’re all set.

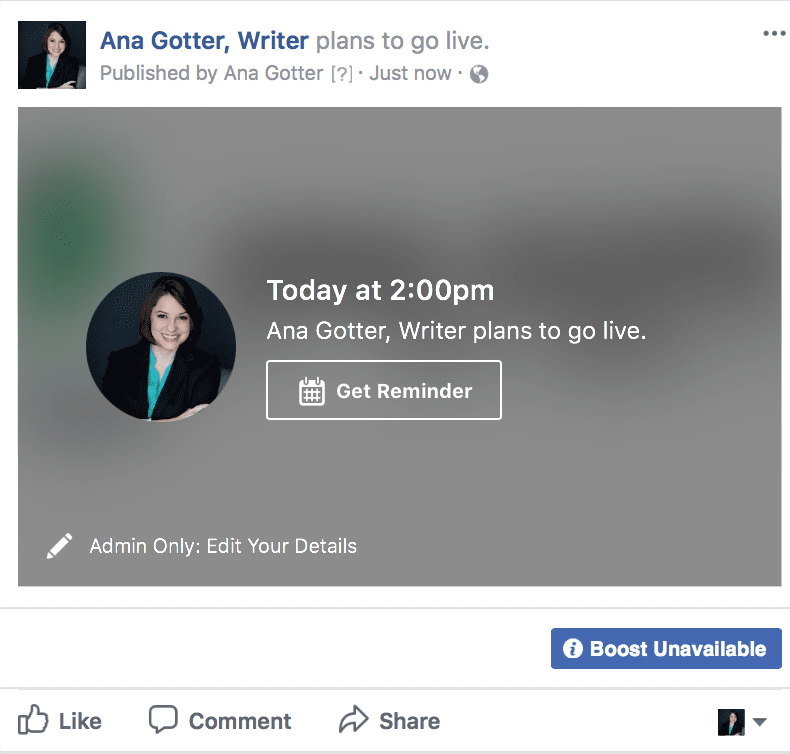
The scheduled live video will appear on your Page for users to see.

Restrictions to Consider
Some live video platforms have certain restrictions or considerations you should keep in mind; Facebook really doesn’t have any in particular.
You just have to keep your live video under four hours long, and you’ll be just fine. Ideally, your live videos should be at least ten minutes long on Facebook. The ideal maximum length depends on the subject of the video and your audience.
Remember that while you’ll have some live engagement, you also want to keep the video short enough that it’s able to maintain viewer retention rates when it’s watched back later.
What Are Instagram Live Stories?
Instagram’s live platform is part of its stories feature, which is their Snapchat-copycat, disappears-after-24-hours feature. Fortunately, they’ve rapidly expanded the feature, and now the live broadcast can not only be shared to your story after it’s over, but it can also be saved to your camera roll so it can be shared on other platforms.
One of the best parts about Instagram live is the visibility boost it can give you. Your live video will automatically stand out in the stories feed, and it may also be featured in the Live section of Instagram’s discover section. This can help connect you with users in your target audience who haven’t heard of you before.
(Fun tip: if you take screenshots of multiple different live videos, including Instagram Stories, it will probably alert the video maker. Just a heads up.)
Instagram Live Features
The important features of Instagram live that should be noted are:
- Broadcasts within app, and both front facing and self-facing cameras can be used
- Some followers will be notified when you go live
- Users can interact with your video in real time, by commenting and engaging
- Instagram is testing the ability to allow you to invite guests onto your live video, much like Facebook’s
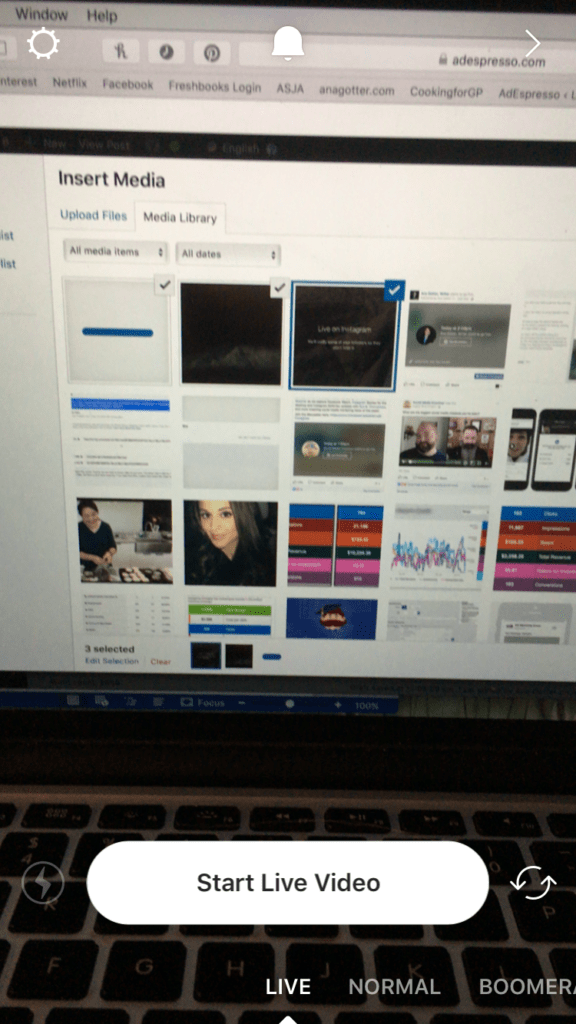
How to Broadcast Live on Instagram
Going live on Instagram is extremely quick and easy. Because it’s part of the stories feature, you won’t need to add in any text to get users to click; they’ll either click on your story or they won’t.
Click to add to your story, and then scroll from “Normal” to “Live” on the bottom.

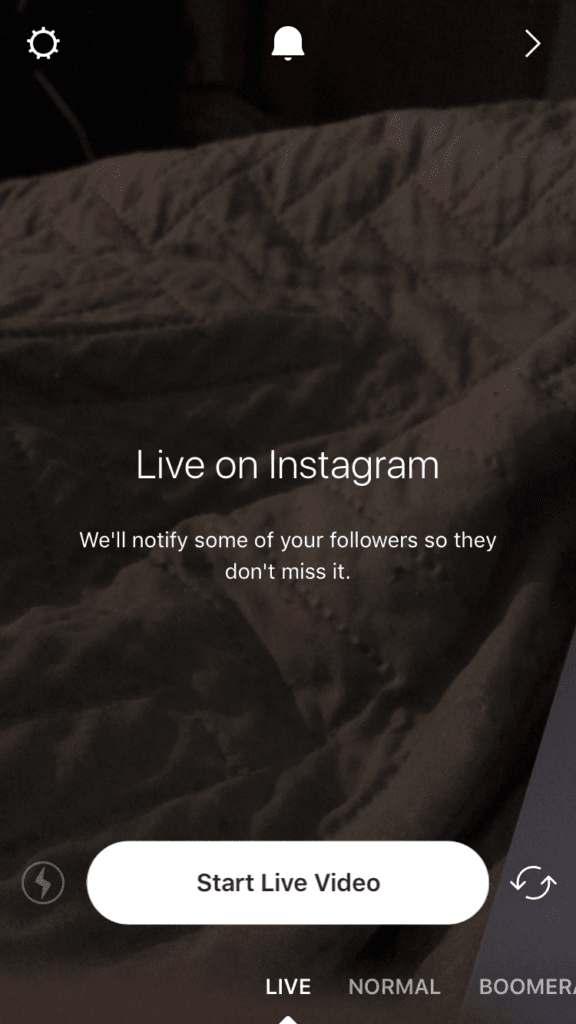
Before you go live, Instagram will give you a heads up to make sure that everything is ready. Click “Start Live Video” again once you’re ready to start broadcasting.

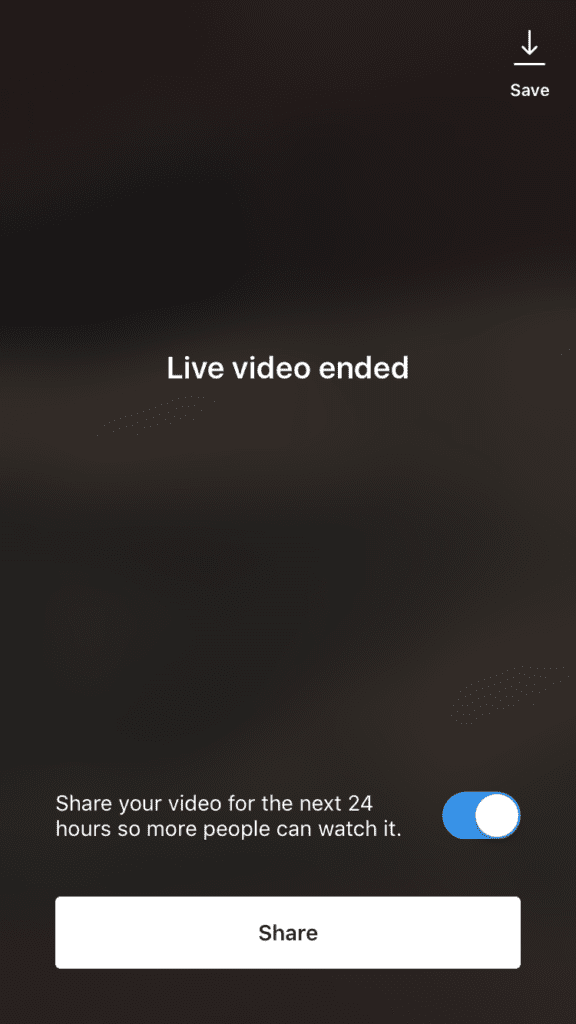
After your video has ended, you’ll see the options to save and share your videos. First, click “Save” in the top right-hand corner; this saves your story to your camera roll so you can share it on other platforms. Then hit share if you’d like it to be published to your story, where it can be viewed for 24 hours before it disappears.

Restrictions to Consider
Because this is part of Instagram’s stories features- meaning it disappears- you should absolutely save your live video to your camera roll. This will allow you to publish the full video on other sites like Facebook, where it can live indefinitely. Republishing content to Instagram, after all, will keep you at the minute limit; that’s just not enough time for most live videos.
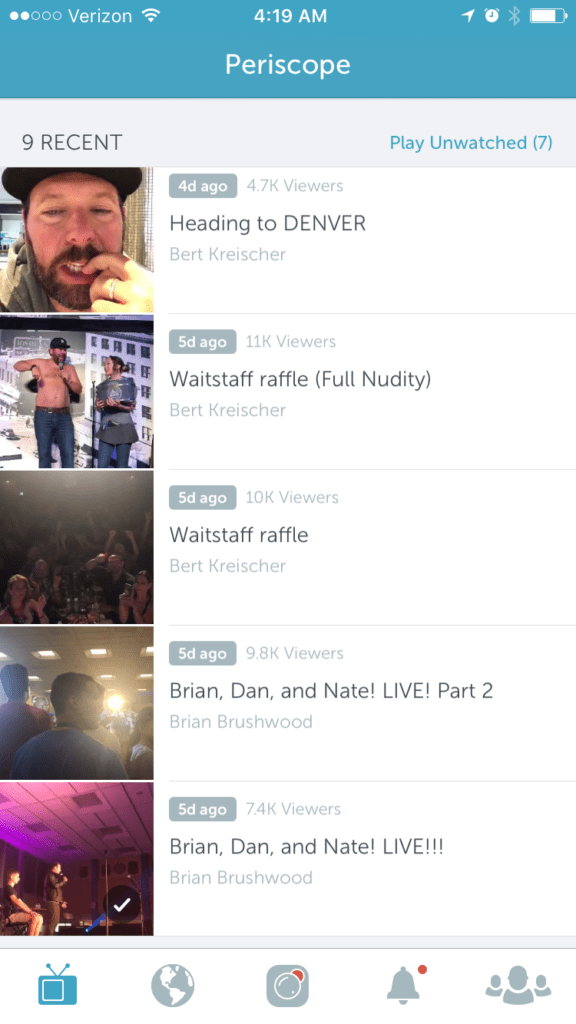
What is Periscope?
Periscope is a live video broadcasting app that is connected to Twitter.
It actually came before both Facebook and Instagram live, even though the latter two got more attention. It exists as a separate app from Twitter, though it’s set up so you can automatically post the live broadcast to Twitter if you choose.
Periscope has its own engaged audience, which can help you increase visibility and engagement.
So how does Periscope work?
Periscope Features
Periscope has several great features, including:
- Both Periscope viewers and the video’s owner can share the video to Twitter, where it will live indefinitely and can help boost engagement
- Users may be notified when your live video begins
- You can auto-save the broadcast directly to your camera roll, allowing it to be shared on other social platforms
- Periscope has its own engaged audience; just make sure you set your videos to public so you can take advantage of that visibility
- Comment moderation features
- Video stabilization features
- Ability to interact in real time with viewers, who are reacting and engaging with the live broadcast


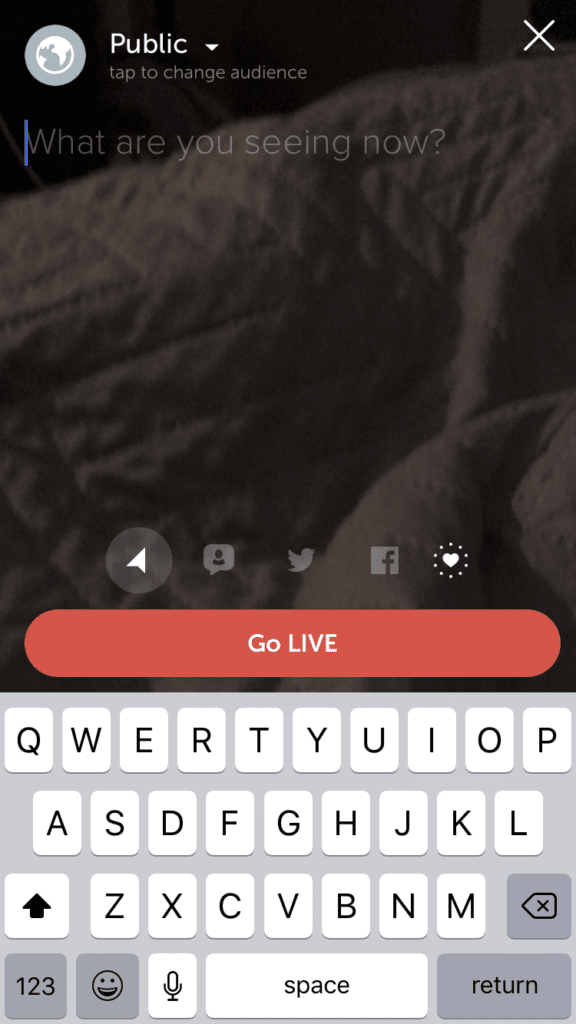
How to Broadcast Live on Periscope
Much like Instagram Live, hosting a Periscope broadcast is exceptionally easy. To start, click on the Camera icon in the center of the navigation bar at the bottom of the Periscope app.

Next, set your audience (for most businesses, this will be public) and descript the video in the “what are you seeing?” text. You can choose to automatically share the video to Twitter and Facebook. Then, once you’re ready, press “Go Live.”

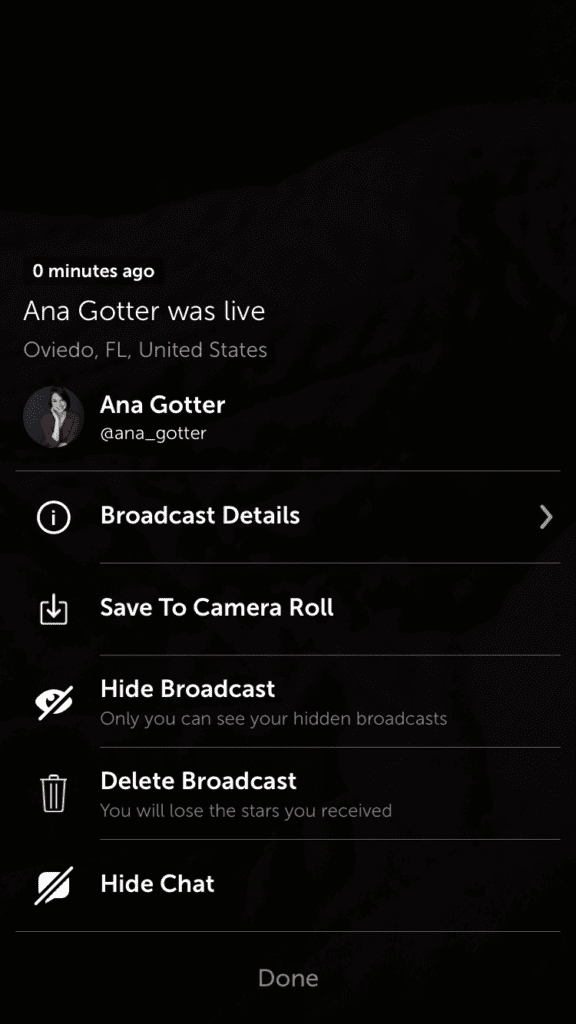
After the broadcast is over, you’ll see the options to save the video to your camera roll, and then potentially upload it on other sites you haven’t chosen to add it to already, and to see broadcast details. You’ll actually be able to see stats on your video there, including live views and video replays.

Restrictions to Consider
From what it seems like, there is no limit to how long your Periscope can be, though it does eat up a lot of battery power. Thanks to an update last year, Periscope can automatically delete your saved broadcast after 24 hours, but you can also opt to have them saved on the site indefinitely now. There are no real limitations or restrictions that most businesses will have to keep in mind when using Periscope.
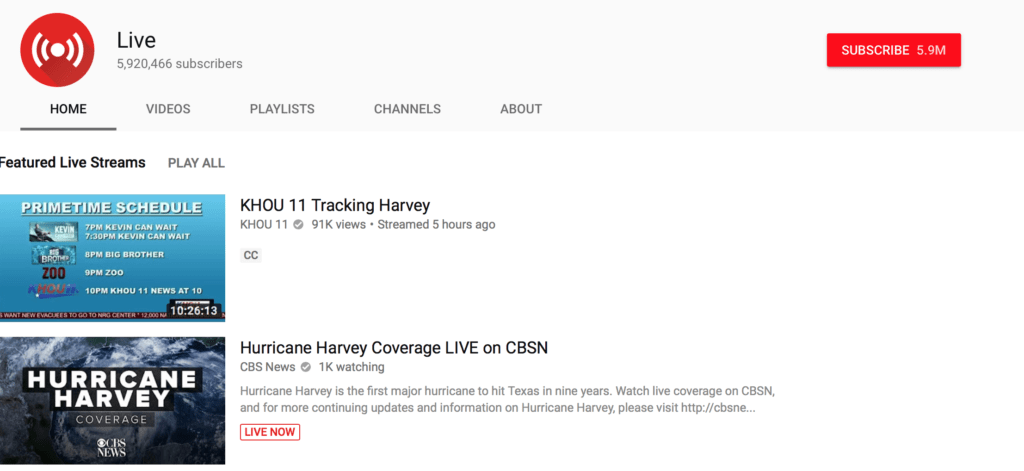
What is Youtube Live Stream?
YouTube has added a live stream feature and channel to their platform. This admittedly caught me a bit off guard at first, because most people don’t use YouTube the same way we typically use other social media sites; users are more likely to automatically check Facebook or Twitter several times a day, and only go onto YouTube when looking for something. That being said, it’s a great live platform.
This platform gives you the option to broadcast live videos in several different ways. You can broadcast directly onto YouTube, like the other options on this list, but you can also create events in advance. You’ll be able to end start and end times for this.
When broadcasting live on YouTube, you’ll be given your own live channel, and your video may show up on YouTube’s live streaming channel.

Youtube Live Stream Features
YouTube’s live streaming works a little different than the other live video tools, so it makes sense it would have different key features. These include:
- Being able to schedule live streams in advance
- You can stream from desktop or mobile
- You can create events, which allow you to enable backup streams
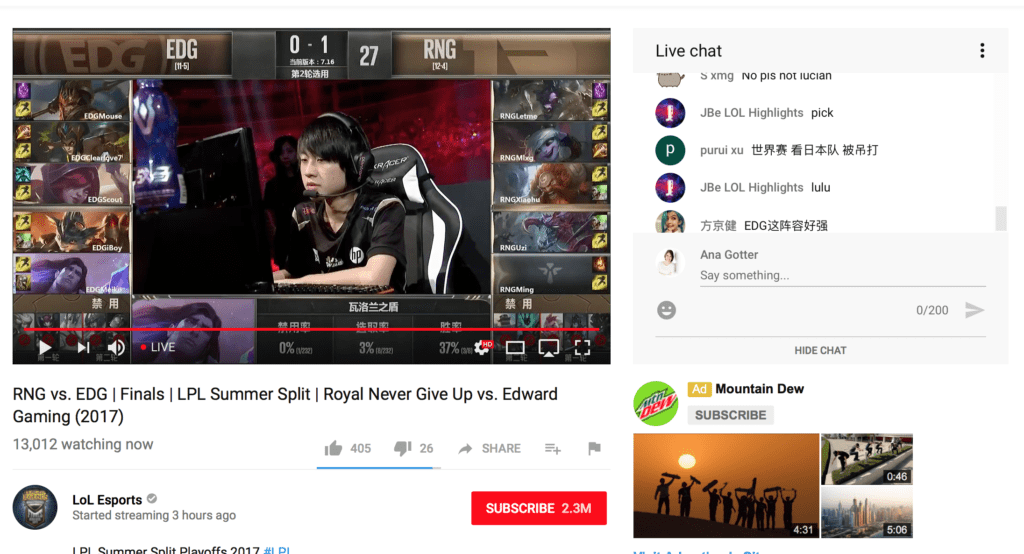
- Ability to interact with users thanks to the live chat option
- Monitor the video with real-time analytics
- Easily share it to other social media sites with social sharing buttons
- Automatically archived the video in your video manager; you can then share this video publicly afterward
- Adjustable privacy settings
- A red “live” label, which shows up even on the home page of YouTube and helps you to stand out


How to Broadcast Live on YouTube
You can create live streams right from your desktop or the mobile app (currently available only for Android users who have more than 100 subscribers). The mobile app is definitely the easiest of the two options, but since I’m all Apple and don’t actually post videos to my own channel, we’re going with the desktop tutorial for this one.
You can access your personal live dashboard here.
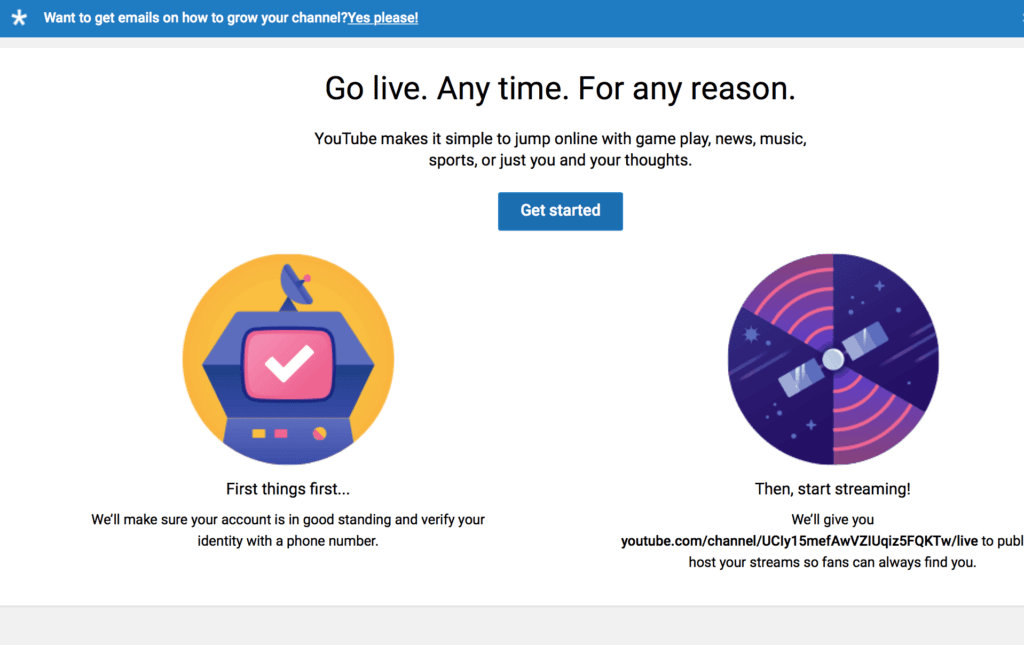

Before you actually get started, YouTube will make sure that 1) your account is in good standing and 2) that there haven’t been any live restrictions placed on your account for the past 90 days. You’ll also need to set up your live account, as noted by the to-do list on the right.

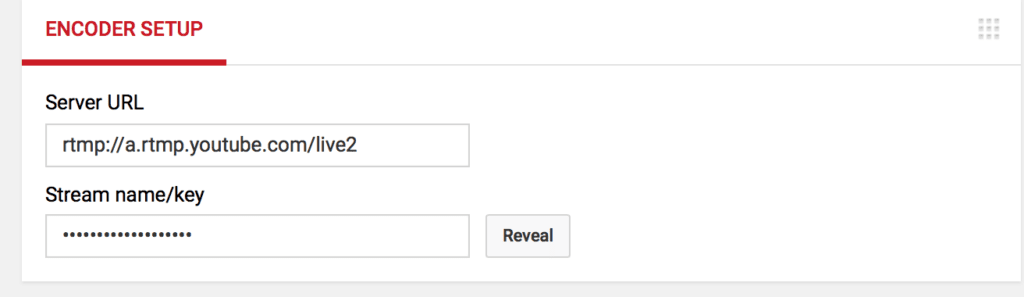
Like Facebook, YouTube will provider you with a stream key to incorporate with the encoder of your choice. This will allow you to stream directly to the channel. You can read more about this here.

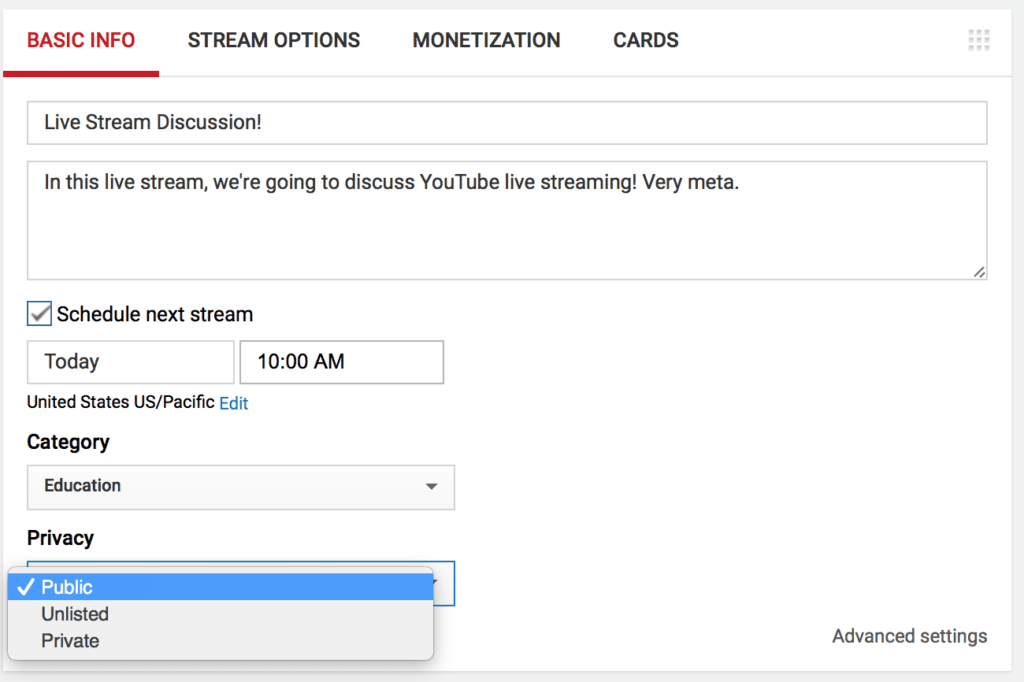
Once you’ve gotten all this squared away, you can schedule or begin your live stream immediately. You’ll want to create an interesting title and description, and you can choose to set the video’s privacy level. You’ll want to choose a relevant category to help your target audience find it.

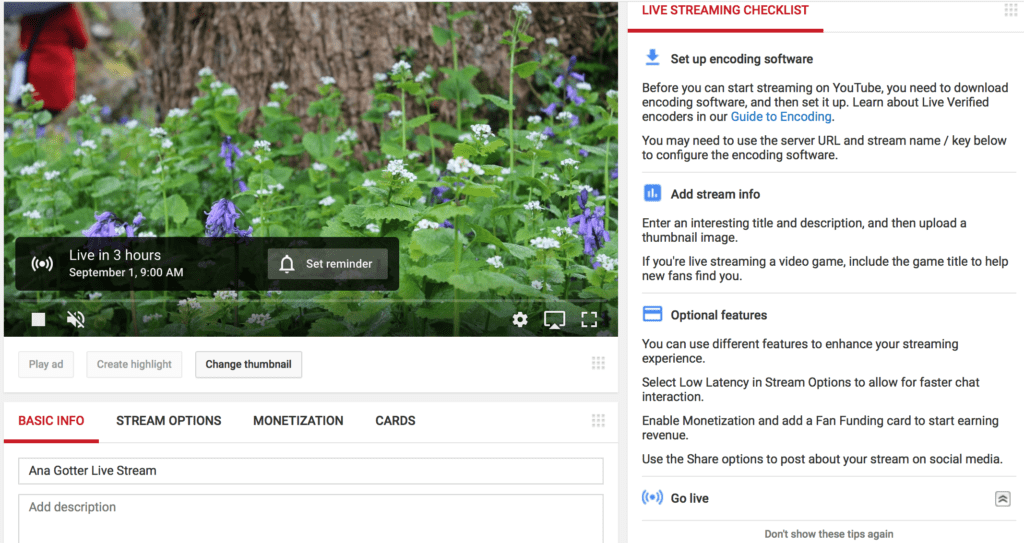
You can go live immediately by clicking the “Play” button on the video screen pictured below.

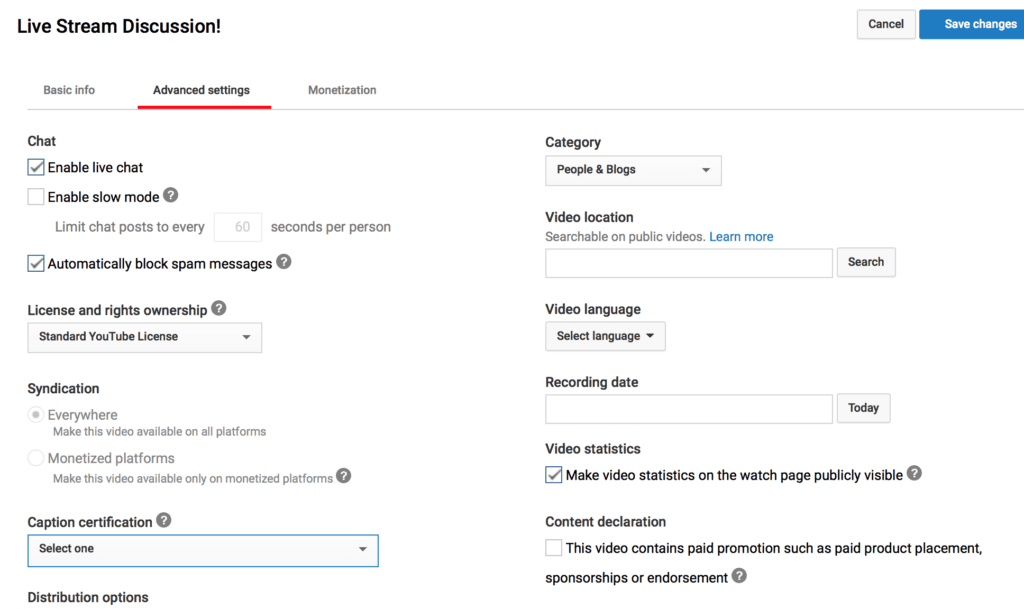
You can also monetize your live stream, add YouTube cards to it, and more. Additional customizable features include:
- Enabling or disabling live chat
- Enabling “slow mode,” which requires users wait a certain amount of time before sending another comment through live chat
- Making video watching statistics viewable by the public
- Automatically block spam messages
- Customizable rights and ownership
- Allowing or disallowing embedding of the video
- Allowing or disallowing up to 4-hour playback during live stream
- Setting age restrictions

Restrictions to Consider
The biggest restriction with YouTube live is that it may not get the immediate attention that other live video platforms may provide. You’ll have to promote the broadcast in advance to ensure your target audience knows about it, because they’re unlikely to be on the site when it goes live to stumble upon it.
The Challenges & Drawbacks of Live Video
The biggest challenges that businesses face with live video is that they’re live. This demands authenticity in a way that can be difficult for businesses to deal with.
I was once watching a broadcast where a small business owner was taking viewers through the store to show them something in the back. In the background, you suddenly heard an employee swear loudly, clearly unaware of what was going on. I about died laughing, but the business owner wasn’t particularly pleased. Unsurprisingly and much to my disappointment, it was not published after the broadcast was over.
In addition to vibrant background characters, live video also poses the challenge of unexpected interruptions. Maybe your phone starts ringing, or a customer walks in, or it starts raining, or you have technical difficulties.
Sometimes the unexpected disruption comes from you. Maybe you forget an important aspect of the topic you wanted to cover because you got derailed by the comments, or you slipped up and said something incorrect.
The point is this: with live video, things happen, and you can’t just go back and start from scratch and re-record until you get it perfect. There’s also no editing the video, so what viewers see is what you’re stuck with. This can be a lot of pressure, but if you follow our best practices (spoiler alert, it’s the next section) you’ll be just fine.
Live Video Best Practices
Almost all of our live video best practices really come down to preparation. Even though it’s live and in the moment, you want to be just as prepared for it as you would be for any client call or interaction. You still want to make a good impression and to represent your business well.
Our best practices include:
- Actually practicing. Know what you want to talk about ahead of time. Go through your spiel two or three times until you’re comfortable but before you become robotic. This will help you feel comfortable with the material, and you’re less likely to go blank when you are live. But just in case…
- Have notecards on hand. One of my clients likes to keep his whiteboard on the other side of the live video camera, where he writes down bullet points of everything he wants to talk about in his live video. It’s a genius strategy.
- Make sure you’re somewhere quiet and preferably brightly lit. Standing on the street corner with cars whizzing by won’t do you a lot of good. Similarly, wait until you know your AC won’t kick on in the background, and if you’re like me, go somewhere where your dogs won’t freak out if the doorbell rings. And, of course, warn any employees in the background that you’ll be going live and to be—as Disney calls it—“stage ready”(aka: no swearing).
- Let people know about the broadcast ahead of time. If you want to really ramp up the views and engagement, let users know you’ll be going live before you do. Facebook makes this easy with their scheduling feature, but even on other platforms you can still post a day or so in advance, and then again an hour before, reminding users you’ll be going live. Don’t forget to cross-promote on other platforms, too!
- Offer incentives for users to view the video. Share exclusive news, give viewers the ability to ask an expert questions, or offer a discount code that will only be valid for a short time after you go live. If you want to up the engagement and views, small incentives can do wonders.
- Choose strong descriptions and headlines. This does two things: it helps you stand out and get views, and it also helps keep users up to speed on the topic of your video. Since you’ll have people entering and leaving at all points, it’s good to have some clear descriptions of what you’ll be talking about so everyone can be on the same page. The only exception is Instagram, which doesn’t give you the option to create either.
- Share the video afterward. It’s almost always a good idea to save and share the video afterward. This gives you more content for your video library and increases the reach of the video. It also lets viewers catch up if they missed any part of the video. You can share the video on additional platforms than the one it was originally filmed on, if it meets the time requirements of other sites.
- Interact with viewers in real time as much as possible. It’s definitely easy to get overwhelmed or swamped with interactions during your live video, but whenever possible, respond to viewers as they’re reacting to you. This gives them more incentive to tune in for future broadcasts and helps build a stronger relationship with them. This is true for every single platform we’ve mentioned here.
Best Use Cases for Live Video
There are some remarkable use cases out there for live video, many of which almost all businesses could benefit from and most audiences respond well to. These include:
- Q&As. There is no social media format better suited to a Q&A. Viewers can ask you questions in real time, or you can answer questions that users had asked before. You can also do a combination of both.

- Interviews. You can interview someone (or someone can interview you!) on any live format, but Facebook’s new split screen feature makes this even more accessible. You can interview people from all over the world, so long as they’re awake and ready to hop on the call with you. Interviewing influencers or industry experts is a great way to drive up visibility, views, and reach.
- Tutorials & Training. Who would say no to a video tutorial? No one. That’s who. Tutorials and training are immensely valuable, and they’ll be valuable both in real time and later on. They’ll be more likely to be shared than some other video types, and it will be a strong contribution to your video library. It’s also a great chance to feature your product. Bonus points to you if you can answer users questions in real time while proceeding with the tutorial, clearing up any common questions or concerns.
- Showcase your live event. Spread some of that FOMO around by broadcasting your event as it’s happening live. You can also broadcast the preparation of the event, like setting up behind the scenes, to help promote it in advance.

- Internal use in private groups. This is a usecase I don’t see discussed often, but I think it’s a great one. More and more businesses are including remote team members into the fold, and it can be difficult to get everyone on one page. Some businesses create secret groups for employees only, and leaders/owners will broadcast live videos to share updates with the team. It’s a little more intimate than a regular video, and has great opportunities for engagement from the team.
- Create a live series. This is a great way to maintain engagement and viewership levels; by creating a “series” of Facebook live videos, you’re almost turning them into an event users can’t miss. They’ll make sure to watch out for them because they know they’re coming, and it allows you to provide continual value to them.
Final Thoughts
Live video is here, and it’s not going anywhere. Businesses and brands of all types should embrace the ability to broadcast live, and learn how to use it on several different platforms. Since this is a feature that many of the social media sites are working on developing rapidly, you want to get on board now, so you don’t fall behind. Realistically, the only social media site I don’t see ever incorporating live video would be Pinterest since the emphasis is on saving content instead of sharing or creating it outright; all other sites, though, you’d better be ready for it.
While many of the live video platforms share similar best practices and considerations to watch for, each individual platform is unique. Each time you go live, consider which will benefit you, your audience, and your message the most and go from there.
What do you think? How do you incorporate live video into your marketing strategy? How has it changed your video marketing distribution? Which platform do you use most often? Leave us a comment and let us know what you think!
SaveSave
SaveSave
SaveSave
SaveSave
SaveSave
SaveSave
SaveSave
SaveSave