

Out of all of the incredible tools Facebook has created for marketers, perhaps the most useful is the Facebook Pixel.
The pixel allows you to monitor how successful your Facebook Ads actually were—giving you more accurate conversion stats—and create custom audiences based on site traffic. Anyone running Facebook Ads should absolutely, without a doubt have the pixel installed.
![]()
In this post, we’re going to go over everything you need to know about the Facebook Pixel, including what you can do with it, how to install it, tools that can help, and how to sidestep new pixel limitations caused by privacy concerns and updates.
8 Reasons Why You Need the Facebook Pixel
Simply put, if you’re sending traffic to your website the Facebook pixel is the difference between success and failure.
The Facebook pixel gives you powerful audience building and tracking options, plus a few more perks including:
- Track the number of conversions like newsletter signups or purchases, the cost per conversion (CPA) and the conversion rate (CVR).
- Revenue reporting: most e-commerce carts can pass the actual order value back to Facebook. This allows you to measure return on ad spend (ROAS).
- Analyze your sales funnel. For example, at AdEspresso we might analyze Leads > Trials > Purchases as our customer journey. In e-commerce you would look at the number of products viewed and compare to the number of add to carts, the number of checkouts initiated and the number of purchases. If the conversion rate is lower than expected at any stage that’s where you can focus your efforts when refining the sales funnel.
- Build website custom audiences (WCAs) of all website visitors for retargeting.
- Create audiences of people that have taken the desired action (leads, purchases etc) to exclude from retargeting. This saves you money and stops leads and customers from getting annoyed.
- Create lookalike audiences in seconds. These pixel-based lookalikes will dynamically update over time so they will always be relevant when using them in cold traffic campaigns.
- You can optimize for conversions. A recent AdEspresso $1,000 experiment showed that optimizing for link clicks cost 3.4 times more per conversion than when optimizing for conversions. Simply put the pixel allows you to get the same results for $1,000 that you’d get by spending $3,400 on ads when not using the pixel.
- Dynamic product ads can be created, allowing you to retarget recent website visitors with the exact products they viewed.

Keep in mind that the pixel can’t work retrospectively, it can only create audiences and track conversions going forward once it has been installed. With increased concern about user privacy, an increasing number of changes on and off-Facebook are impacting the pixel’s true reach. We’ll look at this more later on.
The website custom audiences are valid for up to 180 days so if you install the pixel now it could still be helping your Facebook advertising six months down the line.
How to Create Your Facebook Pixel
Each pixel has its own unique 15 digit ID, which you’ll install on every page you want to track on your site.
There’s two ways to generate your unique code: Through Ads manager and through Business Manager.
Method 1: Through the Ads Manager
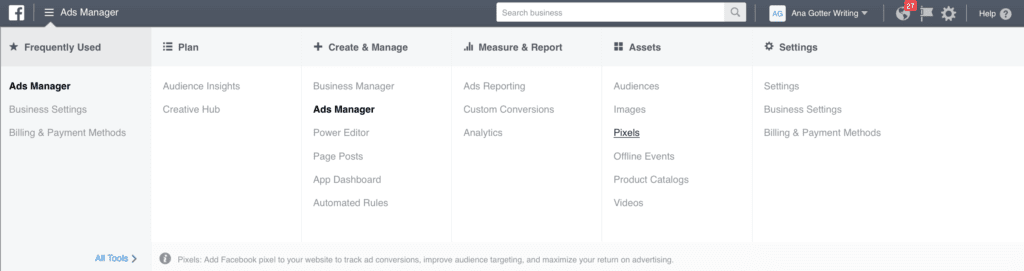
Click on the drop-down menu in the top left corner once you’ve navigated to the Ads Manager, and click on “All Tools” at the very bottom of the options.
Then select “Pixels.”

This is what you’ll see when you land on the pixel page:
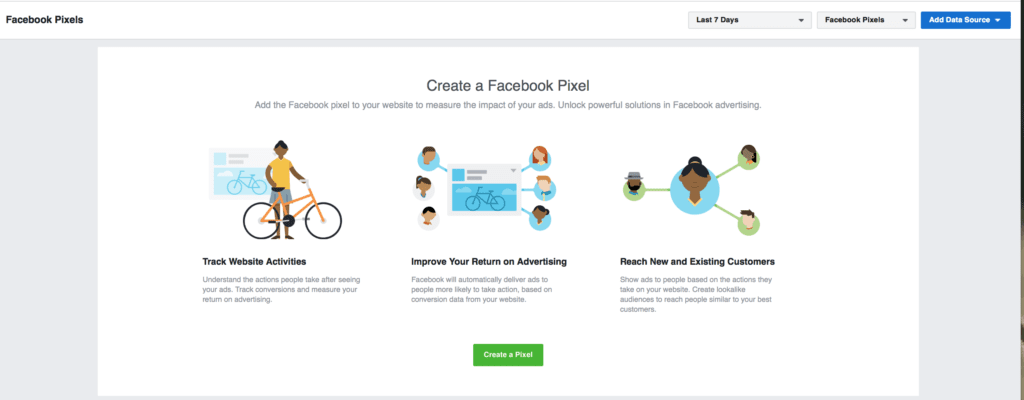

When you hit “Create a Pixel,” all you’ll have to do is name the pixel in order to create it.
![]()

Method 2: Through your Business Manager
Within Business Manager navigate to the pixel section on the left-hand menu and create a new pixel.
![]()

Just as with the ads manager option, give your pixel a name.
Finally, you’ll want to assign the pixel to certain ad accounts so that it can be used in your ad campaigns.
![]()

Once you’ve done either of these methods, you just have to decide how you want to install it.
Which brings us to our next section…
How to Install the Facebook Pixel
When you create your pixel and once it’s time to set it up, Facebook will automatically present you with several different ways to install your pixel.
For this guide, we’re going to show you:
- how to install the tracking pixel manually
- and how to easily install the pixel on Shopify stores.
If you’ve found us because you’re actively searching for how to install the pixel, read through this post in its entirety before starting to add it to your website.
We’re also going to show you how to install specific events into the code, so wait to read that before clicking away and starting the installation process!
Traditional Manual Installation
Manual installation is the traditional and most common way to install Facebook’s tracking pixel. When you’re on the Pixel page in the Ads Manager, you’ll see the option to “Finish Setting Up Pixel” if it’s not installed yet. Click this.
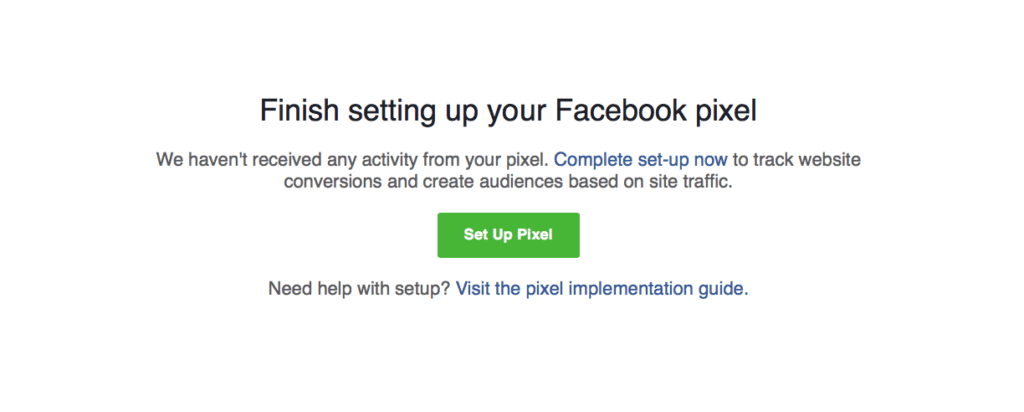

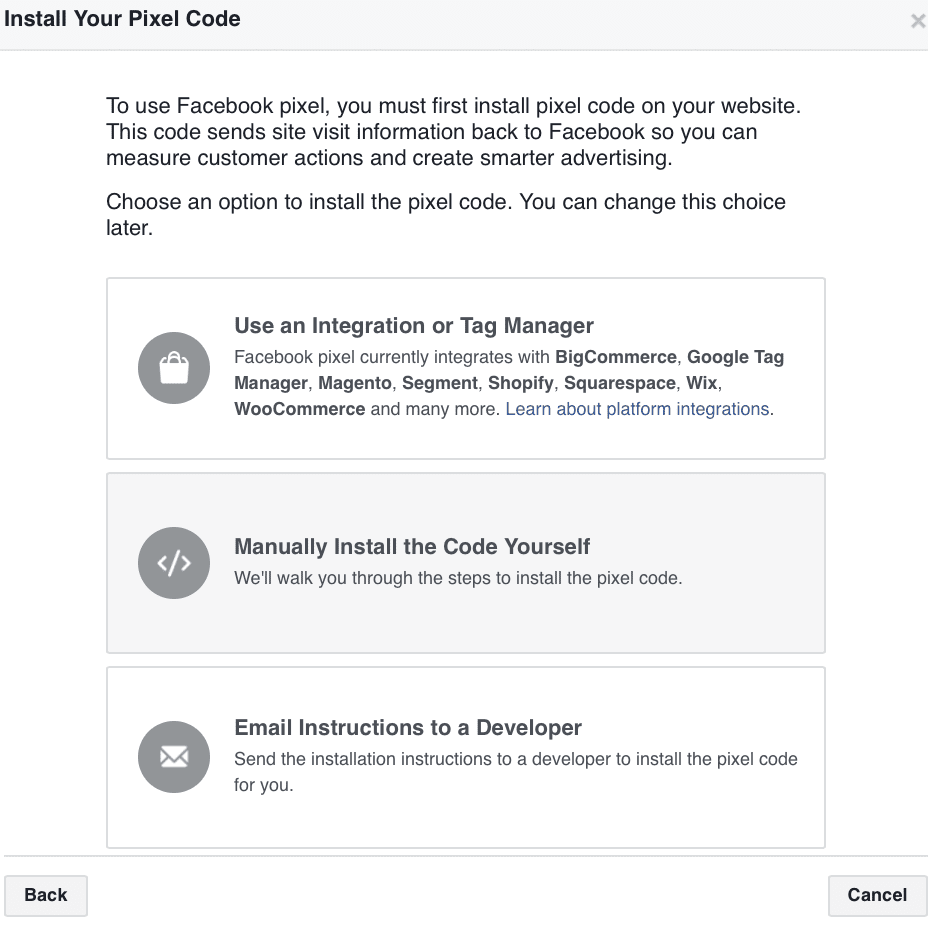
When you see this, you’ll be shown three different options. Go ahead and choose “Install Manually”.

On the next screen, you’ll see an enormous box of text code in step 2.
That’s your pixel. Copy it.
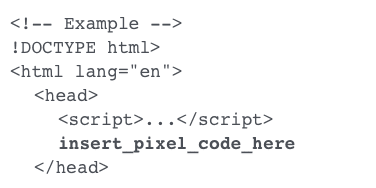
You’ll install it into the header of every individual page on your site that you want to track.
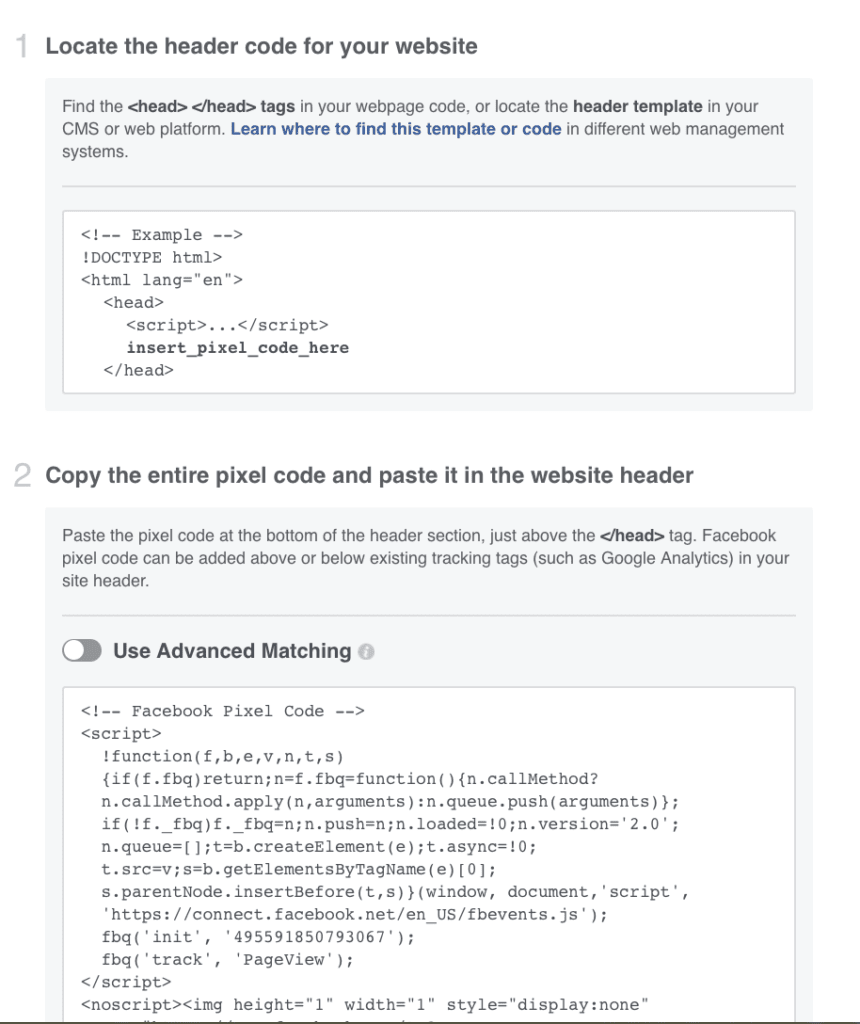

When you click to your site get behind the scenes and, go to each page’s code.
You’ll then install the pixel in the header:

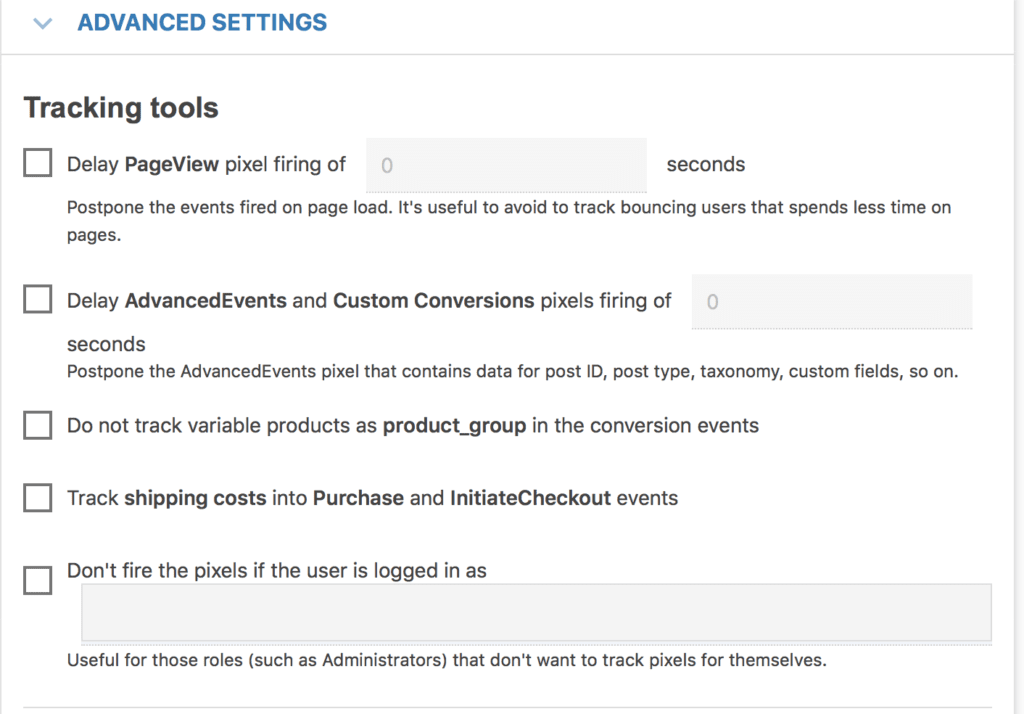
As you can see in the screenshot below, you can also set advanced options (like custom events) and choose to delay pixel firing by a custom number of seconds.

Need more help? Watch this tutorial:

Installing the Facebook Pixel in Shopify
Have a Shopify store you want to install the tracking pixel on? This is actually pretty easy.
First, find your pixel ID.
This can be found on the main Pixel Page, under the pixel’s name.
![]()

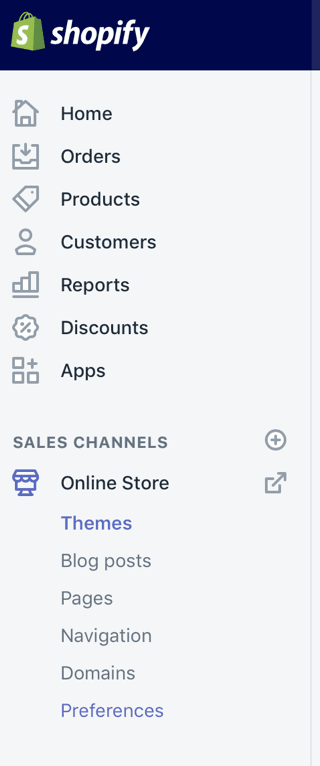
Copy the pixel ID, and then head to your Shopify Store.
Once there, navigate to Preferences, located towards the very bottom of “Sales Channels”.

Once there, scroll down until you see “Facebook Pixel.”
All you have to do now is paste the pixel ID that you’ve already copied from Facebook right into this box:
![]()

Aaaaand you’re set!
How to Add Events to Your Facebook Pixel
After installing the Facebook pixel, you’ll want to add “events” to it in order to determine what you’re actually tracking.
You would, for example, place an extra snippet of code to the end of the pixel when someone adds an item to their cart. You can create custom events, even outside of the ones offered by Facebook.
![]()

How Privacy Concerns & Data Limitations Can Impact Pixel Efficiency
Over the past two years, it’s been nearly impossible to avoid hearing about user concerns relating to privacy and data collection from social media, and Facebook in particular.
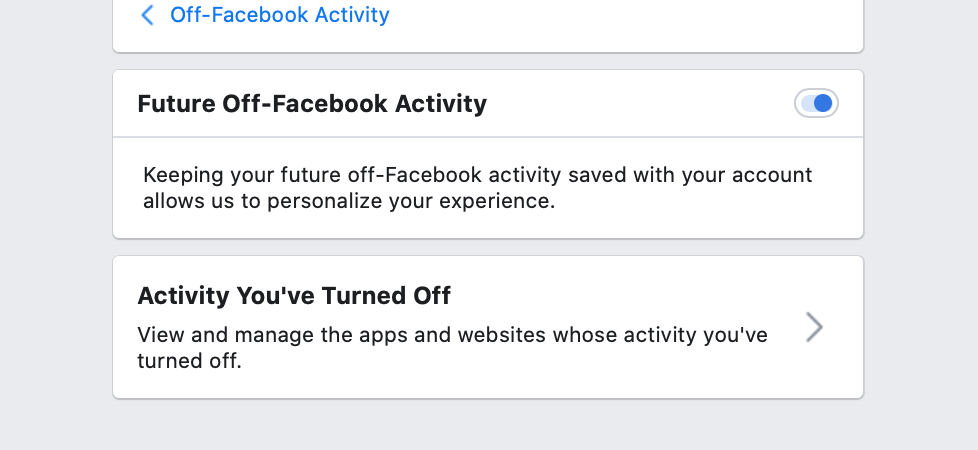
Many users have become uneasy about how much information Facebook stores about their off-platform activity, like what sites they use and where they purchase from. As a result, there has been an abundance of new features to give users more control over data collection… both on and off platform.
Facebook allows users to go through their settings and shut off data tracking. While some privacy-focused users did this almost immediately, the reality is that most did not. They didn’t seem to realize it was an option, or didn’t want to go through the hassle. Pixel performance wasn’t impacted significantly.

The biggest change that can impact the pixel’s efficacy, however, has most recently come from Apple. Their latest big iOS update rolled out new features that actually require users to opt in to data collection for each app; if they don’t the default is that the apps can’t access information.
Since mobile usage is so significant, dominating Facebook usage, this is actually a pretty significant hit. If the pixel isn’t able to track data from large numbers of users, it can reduce your custom audience sizes, impact conversion data, and affect optimization.
How to Get Around the New Pixel Limitations
If you felt your heart start to pound thinking about a less-than-effective or not-so-far-reaching Pixel, we hear you.
The good news, however, is that there is a way around this. Facebook’s Conversions API tool allows you to track data on your own site like pages viewed and conversions event and then send that information to Facebook’s servers… no pixel required.
You can have your own cookies tracking this information and still use it to create retargeting campaigns, custom audiences, and more without the pixel needing to be in use.
In your Events Manager, go to view your pixels, and then choose “Connect Data Sources.”
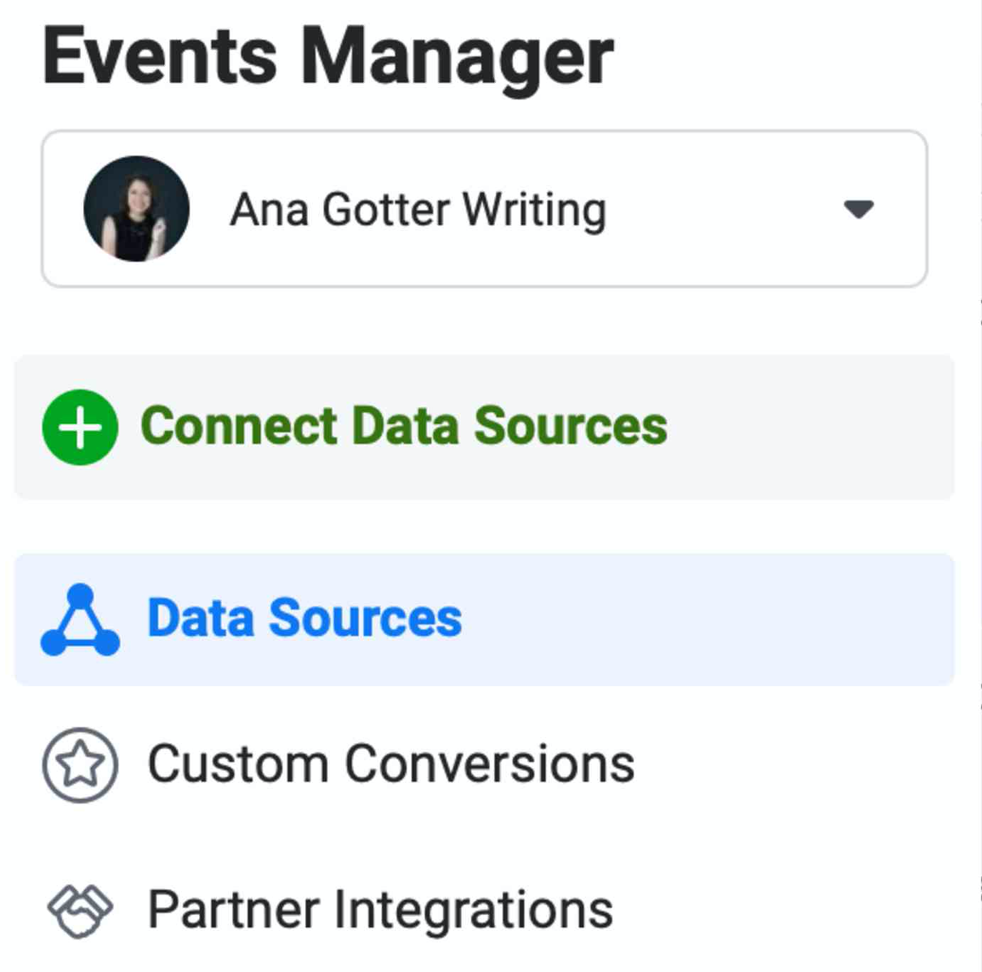

You’ll then set up web events using the Converesions API.
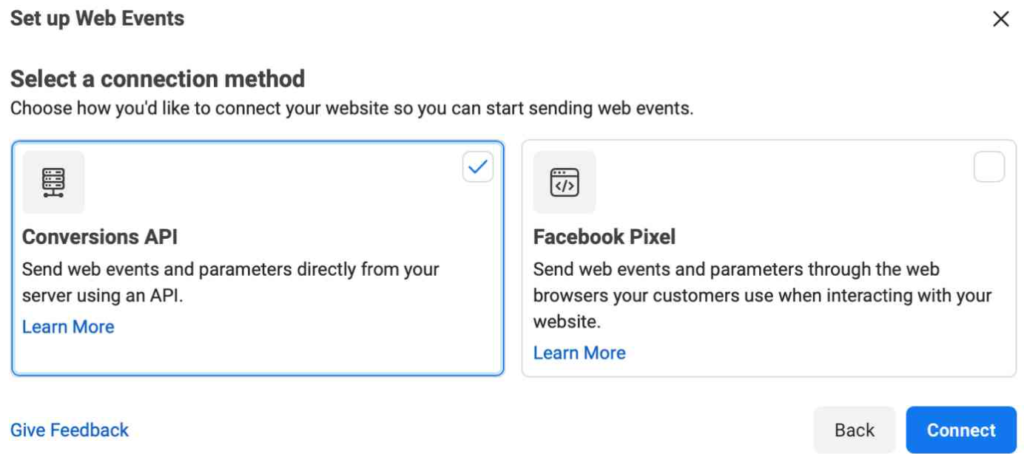

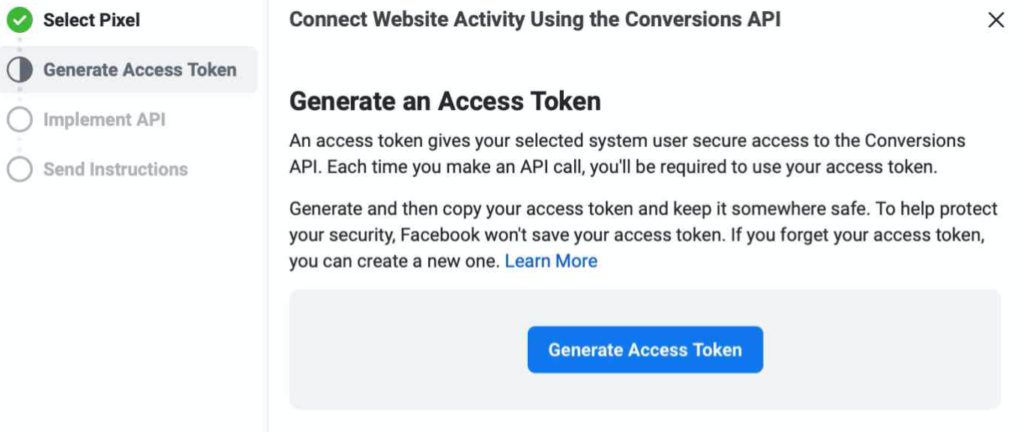
This will generate an access token, which you’ll keep somewhere safe. You can then choose to have a developer install the API or to implement it yourself. You’ll do this by sending a server event to yourself, which you can see how to do here.

How to Set Up Advanced Matching with the Pixel
Do you have advanced matching turned on for your pixel? It’s turned off by default so most advertisers aren’t using it… but you can activate it in under 60 seconds.
Advanced matching allows Facebook to take user-submitted data from your website (such as email addresses and phone numbers) to give more accurate matches and larger custom audiences for retargeting.
![]()

Don’t Forget to Protect Your Pixel
A few days ago we discovered the AdEspresso Facebook pixel had been installed on a website for people looking for “clubs and bars” in Tokyo. That means we were retargeting people not interested in our product and wasting our money. A simple, quick audit of our Pixel fixed the problem.
This could be happening to your business too, right now. But do you know how to stop this?
With Facebook advertising, it’s important to audit your assets every so often. Pixel auditing should be part of your routine Business Manager auditing.
Every time I take on a new client I generally find old employees still with admin access, old pixels on their website and all sorts of junk that need tidying up. You can see who has access to your pixel, and remove anyone if necessary. And if you notice anything suspicious happening with your business or ad account, make sure you contact Facebook directly here.
Conclusion
Even with recent changes that give users more control over data tracking (or that even opt-them out on default), the pixel is still an invaluable tool that all businesses should be using. You can still gain information from it, especially since plenty of users don’t have data collection disabled.
Facebook can’t fully optimize your campaigns without information coming from the pixel, so installing it correctly, adding to your data with the Facebook Conversions API, and letting Facebook do the rest is the way to go.
What do you think? How much do you benefit from Facebook’s tracking pixel? Leave us a comment and let us know what you think!